A television can look impressive in a dark room, yet harsh contrast may make viewing feel tiring. This practical guide explains how to install led strip backlight on back of tv, from measuring the panel to hiding the power cable. The goal is not colorful decoration. It is controlled, neutral illumination behind the screen.
The U.S. Department of Energy’s Solid-State Lighting reports show why LEDs remain efficient, compact, and suitable for low-heat installations. Grand View Research also identifies strong growth in the LED lighting market, driven partly by home entertainment and smart-home products. These reports support the technology, but they do not replace careful installation. A strip that is too bright can reflect from the wall. A strip placed unevenly can create visible hot spots.
Display-calibration expert Joel Silver, founder of the Imaging Science Foundation, is widely associated with this practical guidance: “Bias light should be low-level, neutral, and behind the display.” That principle shapes the steps here. Choose a dimmable strip with a high color-rendering rating, clean the TV surface, and leave ventilation areas unobstructed. Measure twice.
Small details matter. Use a soft cloth, not abrasive paper. Avoid blocking HDMI ports. Test the adhesive before mounting the full strip. Some televisions may not safely power accessories through their USB port, so an external adapter can be the wiser choice. My own caution is simple: installation guides often make the process look effortless. It is not always effortless. Wall texture, cable length, and adhesive quality can change the final result. Expect one adjustment.
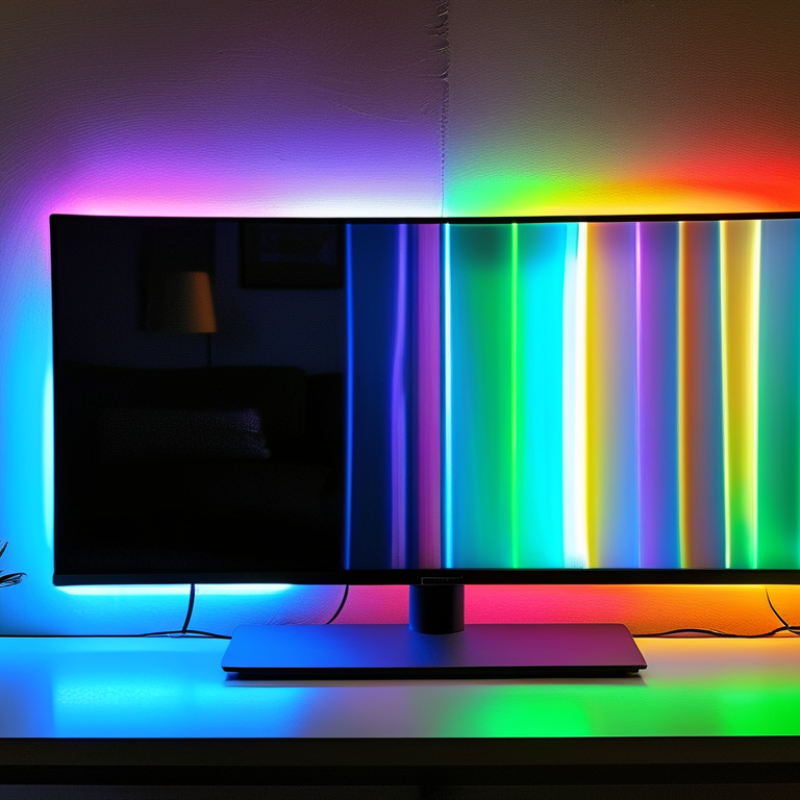
Choose a strip designed for low-voltage television backlighting, not general room lighting. A 5V strip may use a TV’s USB port, but confirm its output current first. Longer strips often need a separate, correctly rated adapter. Leave at least 20% power headroom. For accurate screen perception, select neutral white light near 6500K. A color-rendering index above 90 is preferable. RGB effects look attractive, but they can distort perceived image colors. The U.S. Department of Energy reports that LED lighting uses at least 75% less energy and lasts up to 25 times longer than incandescent lighting. Efficiency still depends on heat control and power quality.
Prepare a tape measure, scissors, a lint-free cloth, isopropyl alcohol, cable clips, and a multimeter. Measure the television edges twice. I once cut a strip too short and had to hide the gap behind the lower bezel. Cut only along marked points. Clean the rear panel until no dust or oily residue remains, then let it dry fully. Check the strip’s voltage, connector direction, and controller compatibility before mounting. Keep cables away from ventilation openings. Unplug the television during installation. Avoid drilling into its casing. Adhesive backing can fail on textured plastic, so small clips may provide better support. The International Electrotechnical Commission’s IEC 62471 framework also emphasizes evaluating optical radiation risks, making controlled brightness and sensible viewing distance worth considering. My first installation was brighter than necessary; reducing the output created softer, less distracting light.
Before installing an LED strip backlight, measure the television, not the box. Record the screen width, height, and depth. Then subtract about 5–8 centimeters from each edge. This setback keeps the glow behind the cabinet instead of creating bright dots around the frame. My first installation sat too close to the edge. The light looked harsh.
Use a flexible tape along the rear perimeter. Leave a small gap near ventilation openings, control buttons, and cable ports. A 55-inch television usually needs roughly 3.5–4 meters of strip, depending on the chosen route. Measure the actual path. Screen size alone can mislead. Mark the starting corner with removable tape, then plan one continuous direction. Avoid sharp bends under 90 degrees, because repeated stress can damage the copper tracks.
Plan brightness before cutting. The U.S. Department of Energy reports that LED products can use at least 75% less energy than incandescent lighting and last up to 25 times longer. The International Energy Agency has also reported that lighting represents about 15% of global electricity consumption. Efficient lighting still needs restraint. A lower brightness setting often creates a cleaner halo and reduces heat. I would test the strip loosely first. The wall may reflect more light than expected, and my original spacing was too narrow. Recheck the layout before removing the adhesive backing.
Before installing an LED strip, unplug the television and let its rear panel cool. Dust, skin oil, and cleaning residue can weaken adhesive. A 2023 U.S. Department of Energy solid-state lighting report confirms that LED systems offer efficient, long-life illumination when thermal conditions are managed properly. The back panel still needs airflow. Do not cover vents, speakers, labels, or connection ports. Wipe the mounting path with a lint-free cloth and a small amount of isopropyl alcohol. Let it dry completely. No moisture should remain.
Measure the perimeter before removing the adhesive liner. Keep the strip about 5–8 centimeters from the edge, especially near curved corners. Press it firmly for 10–15 seconds every few centimeters. Do not sharply crease the strip. Use gentle curves, then add small mounting clips where the adhesive feels weak. This matters because a 2022 lighting industry report from the U.S. Department of Energy identifies installation conditions and heat management as important factors in LED performance. I have found that a clean surface usually holds better than stronger pressure. Still, adhesive alone can fail on textured plastic. That part is easy to underestimate. Leave the power cable with a relaxed bend, and keep it away from hot exhaust areas. ENERGY STAR guidance reports that LEDs generally use at least 75% less energy than incandescent lighting, but efficiency cannot correct poor installation. Check every corner twice. One loose section can slowly pull down the rest.
Clean the TV back with a dry cloth, wipe the mounting path with isopropyl alcohol, and let it dry completely before attaching the LED strip. The chart shows the estimated back-perimeter length for common 16:9 screen sizes, helping you select an appropriate strip length.
Measure the actual TV before installation, leave space around ventilation openings, avoid sharp bends, and press each section firmly for consistent adhesive contact.
How to Install LED Strip Backlight on the Back of TV?
Unplug the television before handling the LED strip or power cable. Measure the rear edges and plan the cable route before removing the adhesive backing. Connect the strip to its controller, matching the arrows or marked terminals. Never force a connector. Check the required voltage and current against the power adapter. A loose connection may cause flickering, heat, or uneven lighting. I once rushed this step and had to reposition the controller later.
Tips: Test the entire strip before mounting it. Place the controller near the television’s lower edge, where its sensor remains visible. Keep the power cable away from sharp corners and ventilation openings. Clean the television surface with a dry, lint-free cloth. Avoid bending the strip tightly around corners. Gentle curves protect the internal conductors.
After testing, attach the strip gradually instead of pressing everything at once. Keep equal spacing from each edge for more balanced illumination. Secure extra cable with small, removable clips. Connect the power adapter only after the strip and controller are fully joined. Turn on the system and check every section for consistent brightness. If part of the strip stays dark, disconnect power and inspect the connector direction. The installation may look simple, but small alignment errors are easy to miss. Follow the included electrical instructions whenever they differ from general guidance.
| Installation Area | Recommended Specification | Typical Value | Installation Notes |
|---|---|---|---|
| TV screen size | Measured diagonally | 32–85 inches | Measure the rear perimeter rather than relying only on the advertised screen size. |
| LED strip placement | Around the rear perimeter | 5–10 cm from the outer edge | Keep the strip on a flat, clean surface and avoid ventilation openings, speakers, ports, and mounting points. |
| LED strip length | Perimeter length plus a small routing allowance | Approximately 2.5–6.5 m | Use the strip’s marked cut points. Do not cut through individual LEDs or unmarked sections. |
| Common strip voltage | Must match the controller and power adapter | 5 V, 12 V, or 24 V DC | Never connect a strip to an adapter with a different output voltage. |
| LED density | Moderate density for TV backlighting | 30–60 LEDs per meter | Higher density can provide smoother light but generally requires more power. |
| Typical power consumption | Check the strip label or technical data sheet | 4.8–14.4 W per meter | Calculate total load as: strip length × watts per meter. |
| Power adapter capacity | Total strip load plus reserve | At least 20% above calculated load | Example: a 48 W strip load should use an adapter rated for at least 58 W at the correct voltage. |
| Controller connection | Controller rated for the same voltage and sufficient current | Power adapter → controller → LED strip | Match positive and negative terminals, or match the connector arrows and markings. |
| Controller location | Accessible and ventilated position | Near the lower rear edge of the TV | Do not cover the controller with insulation or place it directly over a hot area. |
| Surface preparation | Clean, dry, and grease-free | Use a dry microfiber cloth | Allow the surface to dry completely before removing the adhesive backing. |
| Corner routing | Gentle bends or corner connectors | Avoid sharp folds | Do not crease the strip, twist it, or bend it tighter than the manufacturer’s stated limit. |
| Cable management | Low-profile cable clips or removable adhesive mounts | Secure every 20–30 cm | Keep cables away from the TV stand, wall-mount brackets, and moving parts. |
| Power connection sequence | Connect while the adapter is unplugged | Strip → controller → adapter | Inspect polarity and connector alignment before supplying power. |
| Initial lighting test | Test before final cable securing | Run for 5–10 minutes | Check for flickering, dark sections, excessive heat, loose connectors, or uneven brightness. |
| Safety check | Maintain airflow and use an undamaged adapter | Disconnect power before adjustment | Do not install over damaged surfaces or connect components with mismatched voltage ratings. |
After mounting the LED strip, power the TV and inspect every section for uneven light. Look for dark corners, loose adhesive, or sharp bends near the ports. My first test was too quick. The upper edge looked fine, but the lower corner flickered after several minutes. Let the strip run for 10 minutes before judging it.
Set brightness at a low level, then raise it gradually until the wall glows without distracting from the screen. The International Energy Agency’s 2023 Energy Efficiency report estimates that lighting uses about 15% of global electricity consumption. A restrained setting can reduce unnecessary energy use and eye fatigue. Avoid maximum brightness during dark scenes. It may create glare and weaken perceived contrast.
Test color with a neutral gray or white image. White should appear balanced, not blue, green, or pink. Then play a warm-toned scene and check whether skin colors remain natural. If the strip supports separate color channels, adjust red, green, and blue in small steps. Record the final settings. They are useful after power interruptions or firmware changes. The U.S. Department of Energy’s solid-state lighting research reports that leading LED packages can exceed 200 lumens per watt, but complete strip systems perform lower because of controllers, wiring, and heat. Leave ventilation space behind the TV. Heat changes color stability. Recheck it the next evening.
Measure the television itself, not its box. Record the screen width, height, and rear depth. Subtract about 5–8 centimeters from each edge. This setback keeps the glow softer. My first layout sat too close to the frame.
A 55-inch television often needs about 3.5–4 meters of strip. The exact amount depends on the route. Measure the real rear perimeter. Screen size alone can mislead.
Leave small gaps near ventilation openings, control buttons, and cable ports. These areas need clear airflow and access. Keep the strip away from sharp corners. Do not cover vents.
Mark the starting corner with removable tape. Follow one continuous direction around the rear edges. Avoid bends tighter than 90 degrees. Gentle curves reduce stress on the copper tracks.
Yes, test the entire strip while it is still loose. Check every section for even brightness. Recheck the layout before removing the adhesive backing. I skipped this once and repositioned the controller later.
Unplug the television before handling cables. Match the arrows or marked terminals. Never force a connector into place. Check the adapter’s required voltage and current. Connect the adapter only after all parts are joined.
Place the controller near the television’s lower edge. Keep its sensor visible to the remote. Route cables away from sharp corners and ventilation openings. Secure extra cable with small, removable clips.
Use equal spacing from each television edge. Start with a lower brightness setting. A dimmer halo often looks cleaner and produces less heat. The wall may reflect more light than expected. My original spacing was too narrow.
This guide explains how to install led strip backlight on back of tv safely and neatly. Start by choosing a suitable LED strip with the correct length, brightness, and power requirements, then gather basic tools such as cleaning cloths, measuring tape, scissors, connectors, and adhesive supports. Measure the TV and plan the strip layout so the lighting follows the edges evenly without covering vents, ports, or controls.
Before attaching the strip, clean and dry the back of the TV to improve adhesion. Install the lights securely with gentle, even pressure, avoiding sharp bends. Connect the strip to its power source and place the controller where it is easy to access without creating loose cables. Finally, turn on the backlight, check for uneven sections, and adjust the brightness and color to create comfortable illumination while reducing glare and eye strain.
Junhengtai Electronic