7 Tips to Install LED Strip Lights Behind Your TV?

Time:2026-11-03 Author:Amelia
0%

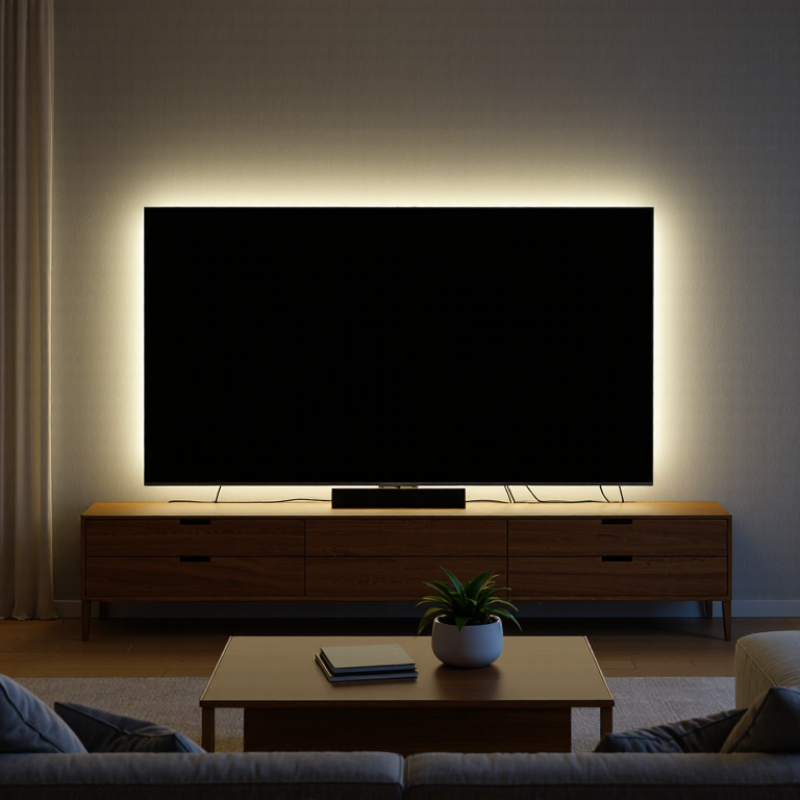
A soft glow behind a television can make evening viewing feel more comfortable, but poor placement creates glare, visible hotspots, or distracting colors. This guide explores how to install led strip backlight on back of tv with practical steps and careful checks. Lighting researcher Mariana Figueiro’s work offers a useful principle for the project: light should support comfort, not compete for attention. Treat that as a guiding idea, not a product-specific installation instruction.

Measure the television’s rear edges before choosing a strip. Check the power source, controller, and strip length, then clean the mounting surface so the adhesive can grip. Small details matter. A loose corner may sag later, while a strip placed too near the screen edge can shine directly into the room. Start with the manufacturer’s instructions, especially for cutting marks, connectors, and power limits. Never cut outside marked points. Test the lights before sticking them in place; peeling and repositioning can weaken the adhesive.

The tips ahead cover planning, surface preparation, corner routing, and brightness settings. They also explain how to keep cables tidy and test the final effect from your usual seat. Use a neutral wall when possible, and avoid turning the LEDs so bright that they become the main event. One honest limitation: adhesive-backed strips do not hold equally well on every TV finish. Check the surface first. A few minutes of preparation can prevent a frustrating rework and help create a clean, balanced glow.
7 Tips to Install LED Strip Lights Behind Your TV?

Choose D65 Bias Lighting at 6,500 K for Neutral Viewing

Tip 1: Choose a white LED setting close to 6,500 K, the D65 reference used for neutral viewing. This helps keep the wall’s glow from making the screen look unusually warm or cool. Check the light’s specifications; “daylight” alone does not guarantee an accurate color temperature. A high color-rendering rating can also help the glow look less tinted. Small detail, but noticeable.

Tip 2: Place the strip a few inches inside the TV’s rear edge, following the top and sides. This lets the wall diffuse the light instead of showing bright dots around the screen. Clean the surface first, then press the strip firmly into place. Avoid covering vents or bending the strip sharply at corners. Check the wall, too: a strongly colored paint can tint even neutral light.

Tip 3: Dim the lights until the halo is visible but not distracting. Bias lighting should soften the contrast between a bright screen and a dark room, not compete with the picture. Sit in your usual viewing spot and adjust the level during a familiar scene. Your eyes may need a few minutes to settle. I’ve found that the “right” setting can feel a little dim at first, so give it time before changing the color temperature.

7 Tips to Install LED Strip Lights Behind Your TV

Choose D65 bias lighting at 6,500 K for neutral viewing. The bars show common nominal LED color-temperature options; the dashed line marks the approximate D65 daylight reference. Match the light behind your TV to this reference to help keep the surrounding illumination neutral.

Measure the TV Perimeter and Match Strip Length to the Layout

Measure the TV’s back, not just the screen. Note the width and height of the panel where the strip will sit, then decide whether you want light along three sides or all four. A flexible tape measure helps around rounded corners. Write down each side separately.

Keep the layout practical. A three-sided strip often leaves the bottom clear for stands, cables, and ports. For a full perimeter, add the top, bottom, and both sides, then allow a little extra for the path to the power source. Check the strip’s cutting marks before buying; many strips can only be cut at marked points. Don’t stretch one to fit. Short is frustrating.

Before sticking anything down, lay the strip loosely behind the TV and check the corners. Some strips tolerate gentle curves but crease under tight bends. Leave room for the power lead, and avoid covering vents or connection panels. Clean the mounting surface and let it dry fully. I’ve found that measuring twice still doesn’t prevent every awkward corner, so test the route before removing the adhesive backing.

Size the Power Supply with the Industry Formula: Volts × Amps = Watts

Before mounting LED strip lights behind a TV, size the power supply from the strip’s rated voltage and power consumption. Use the industry formula:

volts × amps = watts.

For example, a 5-metre strip rated at 14.4 watts per metre needs 72 watts total. At 12 volts, that load draws 6 amps. Add about 20 percent capacity as practical headroom, giving a supply rated for roughly 86 watts or more. This margin is a rule of thumb, not a substitute for the strip maker’s specifications. Check the label carefully.

The U.S. Department of Energy’s 2022 Solid-State Lighting R&D Opportunities report describes laboratory LED package efficacy above 200 lumens per watt. That figure measures light output, not the actual power draw of a finished strip, so calculate from the strip’s wattage rating instead.

Keep the supply ventilated behind the TV, and match its output voltage exactly to the strip. Small detail, big consequence. A supply that is too small may flicker or overheat; an oversized wattage rating is generally acceptable when voltage and polarity match. I still double-check the arithmetic, because product labels can be easy to misread.

Mount the Strip Evenly Behind the TV, Following Its Cut Marks

Before peeling the adhesive backing, measure the TV’s rear perimeter and plan where the strip will start. Keep it a consistent distance from the outer edge, leaving vents, screw holes, and connection ports clear. A paper tape measure or masking tape can help you mark the route. Check the layout from behind the screen.

Clean the mounting surface with a soft, dry cloth, then let it dry fully. Turn off and unplug the strip before cutting. Cut only at the marked cut lines; cutting between them can damage the circuit. Corners need care. Avoid sharply folding the strip, since that can lift the adhesive or strain its contacts. Use a connector if the bend is too tight.

Peel away a little backing at a time and press the strip gently along your guide marks. Check the spacing every few inches, especially near corners, where small errors can become obvious. Don’t pull the strip taut. That’s easy to do. If one section looks uneven, lift it carefully before pressing it firmly; repeated repositioning may weaken the adhesive. Leave a small gap from the TV’s edge so the light does not show directly when viewed from the room. After mounting, reconnect power and test the LEDs before moving the TV back against the wall. A slight offset may still be visible in a dark room, so adjust the position before the adhesive fully sets.

Set Bias-Light Output to About 10% of Display Peak White

A bias light should support the picture, not compete with it. Set the light falling on the wall behind the television to about 10% of the display’s peak-white luminance. ITU-R BT.2035-0 describes a controlled HDTV viewing environment with a subdued surround, while SMPTE RP 166-1995 gives guidance for critical picture evaluation. These standards help explain why a dim, neutral background can make viewing more comfortable. Keep the light neutral white, and avoid visible dots or reflections around the screen.

For example, if measured peak white is 200 cd/m², aim for roughly 20 cd/m² on the illuminated wall. That figure describes wall luminance, not the LED strip’s advertised power or brightness setting. A luminance meter gives the clearest reading; phone sensors are only rough checks. No meter? Start low, then compare a bright scene and a dark scene in your usual room. The wall should look gently lifted, not glowing. I still recheck after changing picture modes, because peak brightness can shift. A little too dim is usually easier to live with than a distracting halo.

FAQS

How do I calculate the power supply size?

Multiply the strip’s voltage by its current to find watts. Check the strip’s label carefully.

How much power does a five-metre strip need?

At 14.4 watts per metre, it uses 72 watts total. At 12 volts, that is 6 amps.

Should I leave extra capacity?

About 20% headroom is a practical rule of thumb. For a 72-watt load, choose roughly 86 watts or more.

Does a higher wattage rating mean more power is forced into the strip?

Not by itself. Match the supply’s output voltage and polarity to the strip.

Can LED efficiency figures tell me the strip’s power draw?

Not reliably. Calculate from the finished strip’s rated wattage, not laboratory package-efficiency figures.

Where should I place the power supply?

Keep it ventilated behind the television. A cramped, warm space can be a concern.

How bright should the wall bias light be?

Aim for wall luminance near 10% of the display’s peak-white luminance. Keep it subtle.

What does that target look like in numbers?

With 200 cd/m² peak white, aim for about 20 cd/m² on the wall. Not the same measurement as strip brightness.

What if I don’t have a luminance meter?

Start dim, then compare bright and dark scenes in your usual room. Phone sensors offer only rough checks.

Should I recheck the setting later?

Yes, especially after changing picture modes. I still recheck; the wall should look gently lifted, not glowing.

Conclusion

Installing LED strip lights behind a TV can create comfortable bias lighting and make viewing easier on the eyes. For neutral color perception, choose a strip rated near D65, or 6,500 K. Measure the TV’s perimeter and plan the route before buying, allowing enough length to cover the intended edges without stretching the strip. To choose a suitable power supply, use the formula volts × amps = watts and make sure its capacity matches the strip’s requirements.

When considering how to install led strip backlight on back of tv, clean and dry the mounting surface, then attach the strip evenly while following its marked cut points. Keep corners smooth and avoid bending or cutting outside the designated marks. After installation, adjust the brightness so the bias light is about 10% of the display’s peak white output. This provides a subtle glow without overpowering the picture or distracting from what is on screen.


Amelia

Amelia

Amelia is a seasoned marketing professional with a wealth of expertise in our company’s core offerings. With an unwavering passion for driving growth and innovation, she plays a pivotal role in shaping our marketing strategies and enhancing brand visibility. A key aspect of her responsibilities......